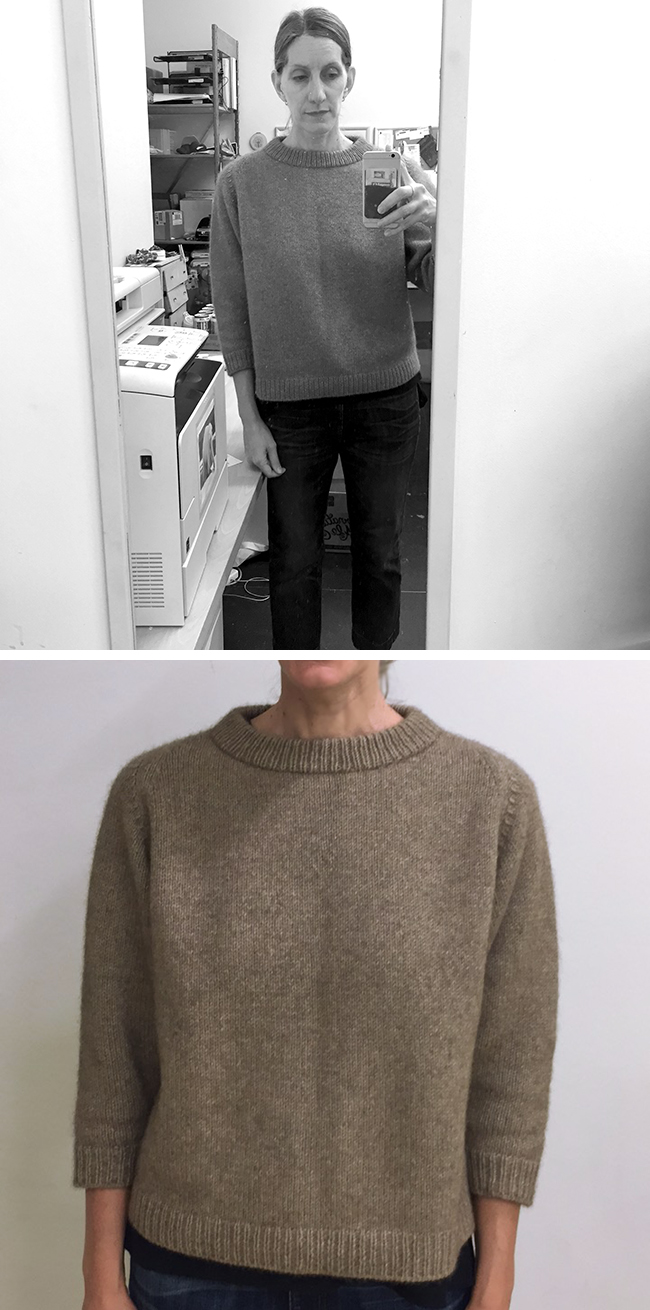
Being a persnickety sort, I’ve written before about converting seamless-bottom-up sleeves to top-down and stopping to block top-down sleeves before finishing them off (among other sleeve-obsessive posts), all in the service of knitting a sleeve to hit exactly where I/you want it. The challenge with sleeves — no matter what you’re making or how you’re making it — is that no two sweaters fit or sit exactly the same way. It’s not enough to think you prefer an 18″ sleeve (and to know how to re/calculate the shaping for yourself), because an 18″ sleeve attached to an 8″ armhole will be an inch shorter than an 18″ sleeve attached to a 9″ armhole. And even then, depending on the density of the garment, the drape, the way it sits at the neck (what kind of neck), even two sleeves of the same length will hang differently. So I’m fanatical about studying a schematic (or plotting out my own course), doing the math — hopefully making sure I’m calculating rows, not measuring unblocked knitting — and so on. I take time to get things just where I want them, and I know how to do that. But then along comes a sweater like this grey Cline of mine, which presents a whole new conundrum.
It seems simple enough: The Cline pattern is designed for 3/4 sleeves, which is not my thing, plus I have long arms and compact row gauge. So if I knitted it as written, they would be more like elbow sleeves (as learned in my try-on). So I needed to add some length, but figuring out how much in this case is not straightforward. Cline has a very unusual sleeve shape — it reminds me of a stingray — and no normal spot from which to calculate measurements. Working from a simple shoulder-to-wrist measurement isn’t an option because the sleeve doesn’t start right at the tip of the shoulder (especially on me). But nor is it a regular raglan yoke-depth situation, where you can add yoke depth and sleeve length for the desired total. It’s something of a hybrid. So once again, the only way to get it exactly how I wanted it was to knit the lower part of the sleeves last. To do this, I did the following:
1.) Cast on the allotted number of sleeve stitches in hot pink waste yarn, as seen in the photo up top, and knitted into them, working in stockinette upwards. (In other words, skipping the cuff ribbing and starting the pattern on the next row.)
2.) Added 8 rows into the start of the sleeve, simply by knitting a couple of extra rows before each of the first few increases.
3.) Knitted the remainder of the sleeves as written, plus the front and back of the sweater.
4.) Blocked everything and seamed the sleeves into position, as well as sewing up the side seams, leaving only the unfinished sleeves unseamed at this point.
5.) Picked up the neckband stitches and knitted the ribbing, so the neck’s affect on the sweater’s hang would be taken into account — especially as I was deliberately cinching up the neck a bit.
6.) Clipped together the unseamed edges of the sleeves and tried it on, and at this point determined how much more stockinette I needed to knit downwards before starting the 2″ cuff ribbing (23 add’l rows, in my case).
7.) Removed the waste yarn and put those live stitches onto the needle to complete knitting the lower arm and cuff.
8.) Used the long-tail tubular bind-off, the world’s best BO, which I find faster and less fiddly than the equivalent version of the tubular cast-on. Same effect with less fuss!
The only thing I didn’t do, and should have, was take a moment to check what the cast-on circumference would amount to. It could actually stand to be 3 or 4 stitches bigger through the forearm (I do have slight Popeye arms) but I’ll see if I can do anything with that the next time I block it. And meanwhile, it’s totally fine!
If you missed it yesterday, here’s the full rundown on this fabulous sweater.
.
PREVIOUSLY in The Details: Grafted patch pockets